Super Easy Homemade Cream Cheese
If you’ve ever wondered whether you could make rich, creamy cream cheese at home — the answer is yes, absolutely!
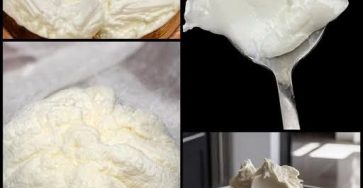
This simple recipe uses only milk, lemon juice (or vinegar), and salt, and delivers the same tangy, smooth, spreadable cheese you’d buy at the store — but fresher, cheaper, and even more delicious.
Whether you’re spreading it on a warm bagel, using it in cheesecakes, or adding it to creamy pasta sauces, homemade cream cheese is a game-changer. It’s incredibly easy to make with just a saucepan, a cheesecloth, and a blender — no fancy equipment or special ingredients required!
Ingredients (Yields about 1 cup)
- 8 cups (2 liters) whole milk
- 5 tablespoons lemon juice or white vinegar
- ½ teaspoon salt (optional, for flavor)
- Use full-fat milk for the creamiest, richest results. Skim milk won’t give you the same texture.
Instructions
Step 1: Heat the Milk
- Pour the milk into a large saucepan and place it over medium-high heat.
- Stir frequently to prevent the milk from scorching on the bottom.
- Heat until it just starts to simmer — you’ll see small bubbles forming around the edges.
- Don’t let it boil — boiling can make the curds tough.
Step 2: Add the Acid
- Turn off the heat.
- Stir in the lemon juice or vinegar, one tablespoon at a time, while gently stirring.
- You’ll see the milk begin to separate — the curds (solid parts) and whey (liquid) will form.
- Let the mixture rest for 5–10 minutes to allow full curdling.
- Step 3: Strain the Curds
- Line a colander or strainer with cheesecloth (or a clean kitchen towel).
- Carefully pour the mixture through it to separate the curds from the whey.
- Rinse the curds gently under cold water — this removes the sour taste from the acid and cools them down.
- Gather the edges of the cloth and squeeze out as much excess liquid as possible.
- The more you squeeze, the firmer your cream cheese will be.
Step 4: Blend Until Creamy
- Transfer the curds to a blender or food processor.
- Add ½ teaspoon of salt (optional, but enhances flavor).
- Blend on high until smooth, creamy, and spreadable — this should take about 1–2 minutes.
- If it’s too thick, add 1–2 tablespoons of whey or milk to loosen the texture.
Step 5: Chill and Set
- Transfer your cream cheese to an airtight container.
- Refrigerate for 30 minutes to 1 hour to let it firm up.
- Once chilled, it will have that perfect creamy consistency!
Storage
- Refrigerate: Keep in an airtight container for up to 7 days.
- Freeze: Store in the freezer for up to 2 months. Thaw in the fridge overnight and stir well before using.
- You can also flavor your cream cheese before storing — see below for ideas!
Flavor Variations
Make your homemade cream cheese even more exciting with these flavor add-ins:
- Herb & Garlic: Mix in ½ tsp garlic powder + 1 tbsp chopped parsley or chives.
- Honey & Cinnamon: Add 1 tbsp honey + ¼ tsp cinnamon for a sweet spread.
- Smoked Paprika: Add a pinch for a smoky, savory twist.
- Everything Bagel Style: Mix in sesame seeds, dried onion, garlic flakes, and poppy seeds.
Serving Ideas
- Spread on bagels, toast, or croissants.
- Use as a base for dips and spreads.
- Add to mashed potatoes or creamy pasta sauces.
- Use in baking — cheesecakes, frosting, or savory pastries.
Pro Tips
- Use fresh milk, not UHT or ultra-pasteurized, for best curdling results.
- If your milk doesn’t separate easily, add 1–2 extra tablespoons of lemon juice or vinegar.
- The leftover whey can be used in smoothies, soups, or bread dough for extra protein!
Final Thoughts
This Super Easy Homemade Cream Cheese is proof that great food doesn’t have to be complicated.
In just a few simple steps, you can transform basic milk into a luxurious, creamy spread that tastes far better than anything store-bought.
It’s fresh, wholesome, and completely customizable — once you try it, you’ll never go back to the packaged version again.