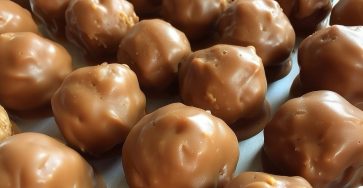
Homemade Butterfinger Balls — No-Bake Candy Heaven
Craving that perfect mix of crunchy peanut butter, flaky toffee-like layers, and rich chocolate coating? These Homemade Butterfinger Balls are everything you love about the classic candy bar — in bite-sized, no-bake form!
They’re fun, easy to make, and dangerously delicious — perfect for holidays, parties, or when you need a sweet treat in a pinch.
Why You’ll Love This Recipe
- Only 5 ingredients!
- No candy thermometer needed
- Tastes just like Butterfinger bars — but creamier inside
- Freezer-friendly and perfect for gifting
Ingredients
- 3 cups candy corn
- 1½ cups creamy peanut butter
- 2 cups milk chocolate chips (or semi-sweet if you prefer)
- 1 tablespoon vegetable shortening or coconut oil (for smoother melting)
- Optional: Sea salt flakes for garnish
Time
- Prep Time: 15 minutes
- Chill Time: 45 minutes
- Total: 1 hour
Instructions
Step 1: Melt the Candy Corn
In a microwave-safe bowl, heat the candy corn in 30-second intervals, stirring between each, until fully melted and smooth (about 1½ to 2 minutes total)
Tip: Candy corn melts fast but can scorch easily — stir often!
Step 2: Mix in the Peanut Butter
Quickly stir the peanut butter into the hot candy corn until smooth and fully combined. The mixture will be thick and sticky — that’s okay!
Let it cool for 3–5 minutes until it’s easy to handle but still pliable.
Step 3: Shape the Balls
Scoop about 1 tablespoon of the mixture at a time and roll into small balls (you should get around 24–30).
Place them on a parchment-lined baking sheet and refrigerate for 30 minutes, or until firm.
Step 4: Melt the Chocolate
In another bowl, melt chocolate chips and shortening/coconut oil together in 30-second bursts in the microwave, stirring between each round until smooth and glossy.
Step 5: Dip and Set
Using a fork or dipping tool, dunk each chilled peanut butter ball into the melted chocolate, coating evenly.
Place them back on the parchment paper and sprinkle with a pinch of sea salt flakes if desired.
Chill for another 15–20 minutes until the chocolate hardens.
Optional Variations
- Crunchy twist: Mix in ½ cup crushed cornflakes or Rice Krispies for extra crunch.
- Dark chocolate version: Use dark or bittersweet chocolate for a richer flavor.
- Butterfinger bars: Instead of rolling into balls, press the mixture into a parchment-lined pan, chill, and cut into rectangles before dipping.
Storage
- Store in an airtight container in the fridge for up to 2 weeks.
- Freeze for up to 2 months — just thaw for 10 minutes before eating.
Tips for Success
- Work quickly while forming balls — the mixture stiffens as it cools.
- If it gets too hard, microwave for 10–15 seconds to soften again.
- For perfectly smooth chocolate, let the melted coating cool slightly before dipping.
Final Thoughts
These Homemade Butterfinger Balls are a little crunchy, a little chewy, and a whole lot of irresistible. Each bite bursts with that caramelized peanut butter flavor wrapped in silky chocolate.
They taste like childhood nostalgia in a truffle — and they disappear fast, so make a double batch!