Homemade Cherry Ice Cream – Creamy, Sweet, and Fruity
Meta Description:
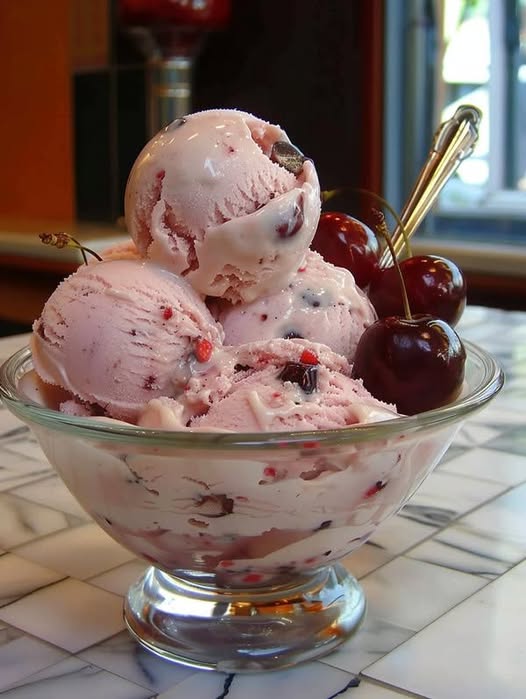
Make your own Homemade Cherry Ice Cream with fresh cherries, heavy cream, and a touch of vanilla. This easy and delicious recipe creates the perfect creamy, fruity dessert!
Introduction:
There’s nothing quite like Homemade Cherry Ice Cream made with fresh, sweet cherries! This recipe combines the natural flavor of cherries with a creamy, smooth base of heavy cream and whole milk. The result? A homemade treat that’s far better than store-bought!
Perfect for summer, holidays, or whenever you’re craving a cool, fruity dessert, this cherry ice cream is simple to make, using only a few ingredients you probably already have at home. Let’s dive into how to create this deliciously sweet treat!
Ingredients:
- 2 cups cherries, pitted and halved
- 1 cup heavy cream
- 1 cup whole milk
- 3/4 cup granulated sugar
- 1 teaspoon vanilla extract
- Pinch of salt
Directions:
Step 1: Macerate the Cherries
- Toss the pitted and halved cherries into a medium bowl with 1/4 cup of sugar.
- Let them sit for about 30 minutes to macerate. This helps draw out the cherries’ natural juices, making them even sweeter and more flavorful.
Step 2: Make the Cream Base
- In a separate bowl, whisk together the heavy cream, whole milk, the remaining 1/2 cup of sugar, vanilla extract, and a pinch of salt until the sugar is completely dissolved.
Step 3: Combine Cherry and Cream Mixtures
- Once the cherries have macerated, fold them into the cream mixture and stir until everything is fully combined. The cherries should add a lovely pink hue to your base.
Step 4: Churn the Ice Cream
- Pour the combined mixture into your ice cream maker and churn according to the manufacturer’s instructions. You’ll churn until it reaches a soft-serve consistency—this usually takes around 20-25 minutes, depending on your machine.
Step 5: Freeze the Ice Cream
- Transfer the ice cream to a lidded container and place it in the freezer. Freeze for at least 4 hours, or until the ice cream is firm enough to scoop.
Step 6: Serve and Enjoy
- Once your cherry ice cream is frozen to perfection, scoop it into a bowl or cone, and enjoy the sweet, creamy goodness!
Why You’ll Love Homemade Cherry Ice Cream:
- Made with Fresh Cherries: Using fresh cherries really elevates the flavor, bringing a bright, fruity punch to this creamy treat.
- No Artificial Flavors or Colors: This homemade version allows you to avoid the artificial flavors and colors often found in store-bought ice cream, making it a more natural and healthier choice.
- Perfect for Summer: Homemade cherry ice cream is a great way to enjoy the season’s bounty of fresh cherries in a cool, refreshing treat.
- Simple Ingredients: With just a handful of ingredients, this easy ice cream recipe can be made quickly with little fuss.
Additional Tips and Variations:
- Add a Swirl: For extra flavor, add a swirl of chocolate sauce or cherry jam into the ice cream before freezing for a marbled effect.
- Dairy-Free Option: Use coconut milk or almond milk and a dairy-free cream alternative to make this recipe suitable for those avoiding dairy.
- Make it Crunchy: For added texture, sprinkle in some crushed graham crackers or chopped nuts like almonds or pecans into the ice cream during the last few minutes of churning.
- Tart Cherries: If you prefer a more tart flavor, feel free to swap sweet cherries with tart cherries or sour cherries for a tangy twist.
Nutrition Information (Per Serving):
- Calories: 230
- Protein: 2g
- Carbs: 28g
- Fat: 13g
- Fiber: 1g
- Sugar: 23g
(Note: These values are approximate and may vary depending on the exact ingredients used.)
Conclusion:
There’s nothing quite like the indulgence of Homemade Cherry Ice Cream made from scratch with fresh, sweet cherries. This simple yet creamy treat is perfect for a summer day or any time you crave something deliciously sweet and fruity. With its natural flavors and smooth texture, this ice cream will quickly become your go-to dessert.
So grab your ice cream maker, and let’s make this homemade cherry ice cream today!